How to install WordPress using the WordPress Toolkit

Marc
Last Update 2 months ago
This topic covers processes relating to a cPanel service.
You will need to be logged into the cPanel account to follow the steps. If you're not sure how to access your cPanel service — please, follow this guide before continuing: How do I login to cPanel?
The WordPress Toolkit simplifies the installation (and, if necessary, removal) of WordPress sites by providing a user-friendly interface for managing WordPress installations.
The following steps go over how to install/delete WordPress sites using the WordPress Toolkit.
To install an instance of WordPress
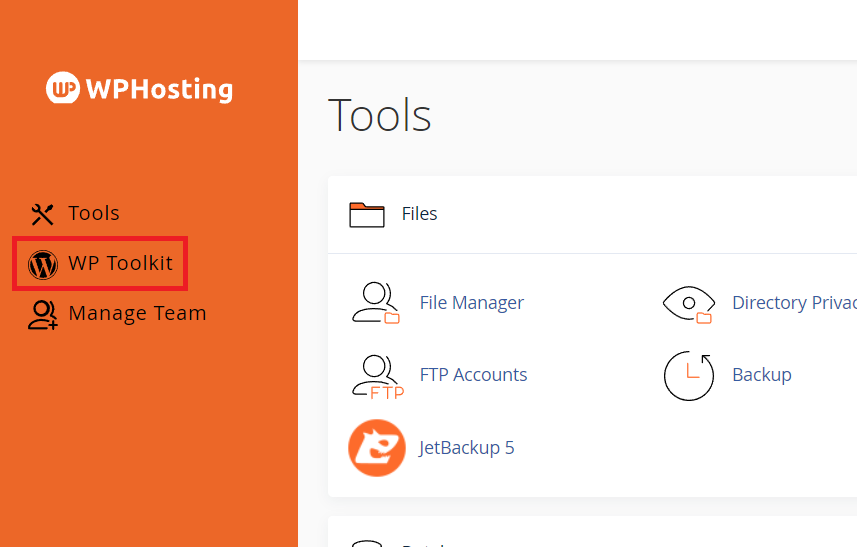
1. First, log into cPanel
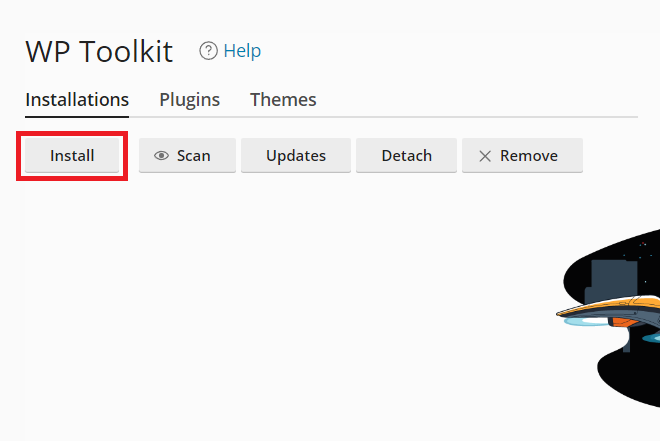
2. Navigate to the 'WordPress Toolkit' from the side menu on the left of the cPanel interface
3. Next, from the Toolkit dashboard, click 'Install'
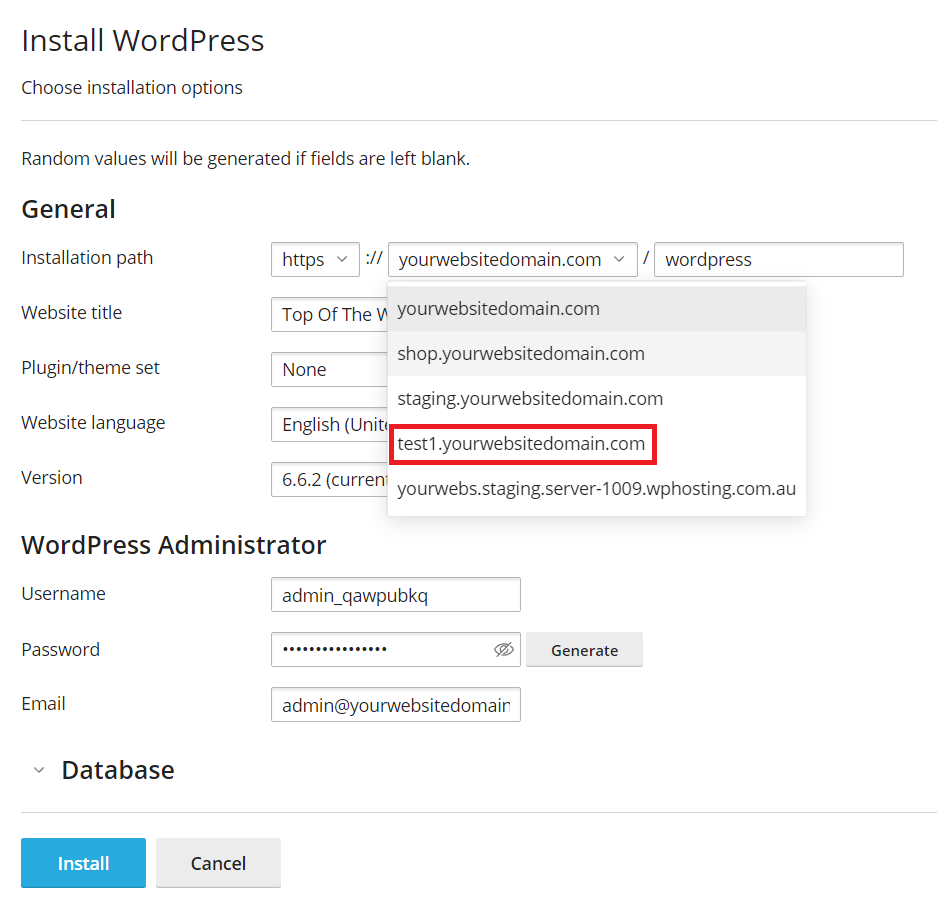
4. A menu will appear on the left, select your installation options here.
Most settings can be left as default, however, please pay special attention to the 'installation path'.
If you want to install WordPress anywhere other than the default domain, such as a subdomain or an add-on domain, select that domain/subdomain from the drop-down list.
Leave this blank to install to the root directory like "domain.com", rather than a sub-folder like "domain.com/newsite" for example.
PLEASE NOTE:
- Please also pay special attention to the 'installation path' field after the slash (/).
- Leave this blank to install to the root directory, such as "domain.com" rather than a sub-folder like "domain.com/newsite" for example.
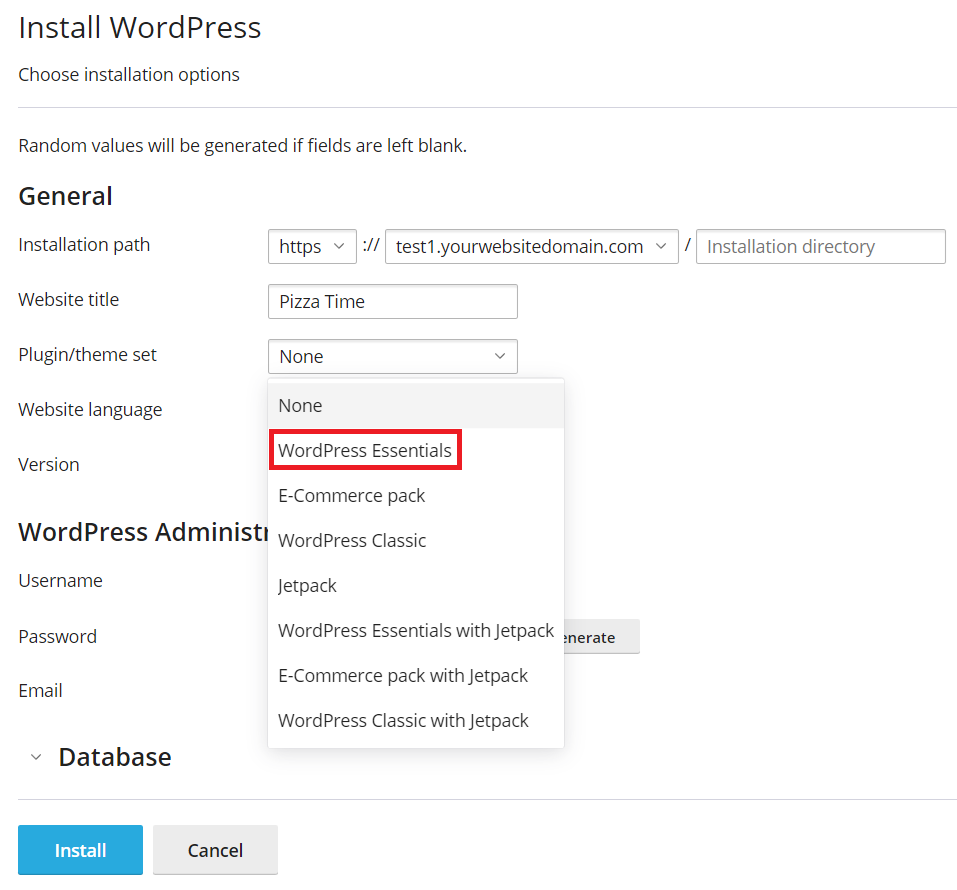
5. In the Plugin/Theme section, you can leave this as 'none' to start with a blank canvas or choose a preset which will install certain plugins along with WordPress.
If you only need basic plugins, selecting the 'WordPress Essentials' package is usually a good choice. However, if you're setting up an online store, you might want to choose the 'E-commerce Pack', which will include WooCommerce and other similar tools for your WordPress site.
As good security practice, choose a strong, complex password. You can choose your own or click 'Generate' to create a strong, random password (click the 'eye' icon to show/hide the password).
Also avoid using common usernames like 'admin' and be sure to make a note of the username and password you choose.
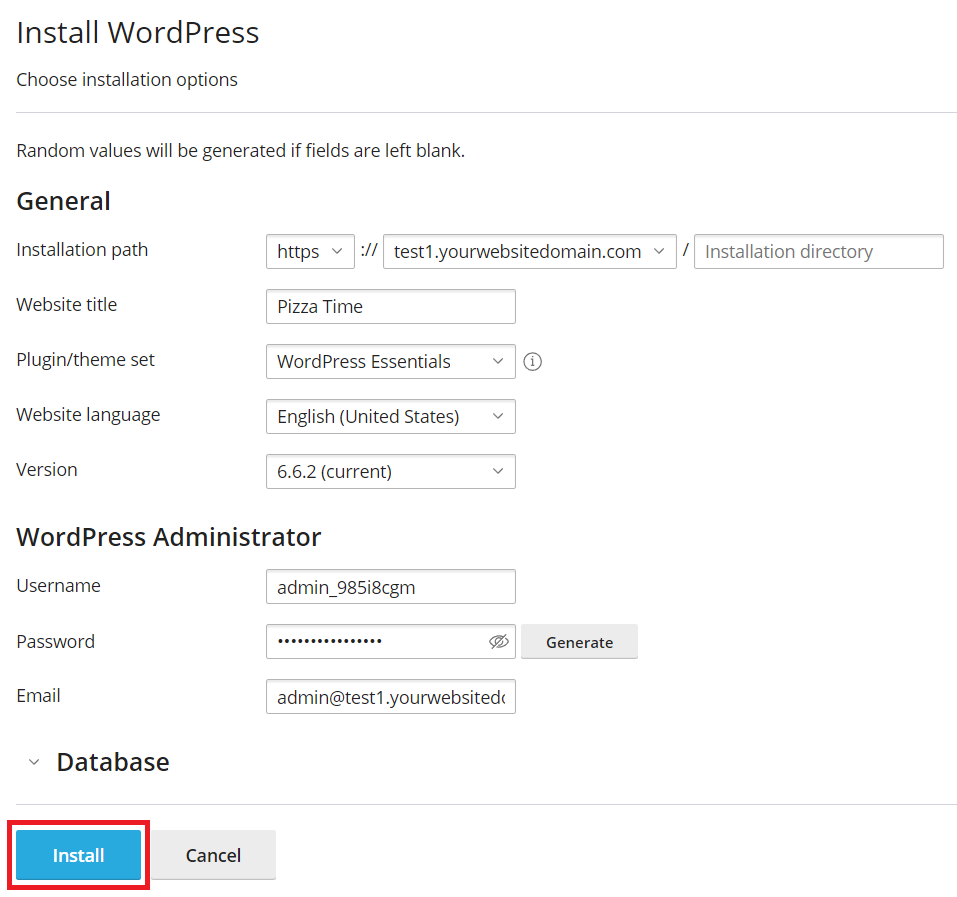
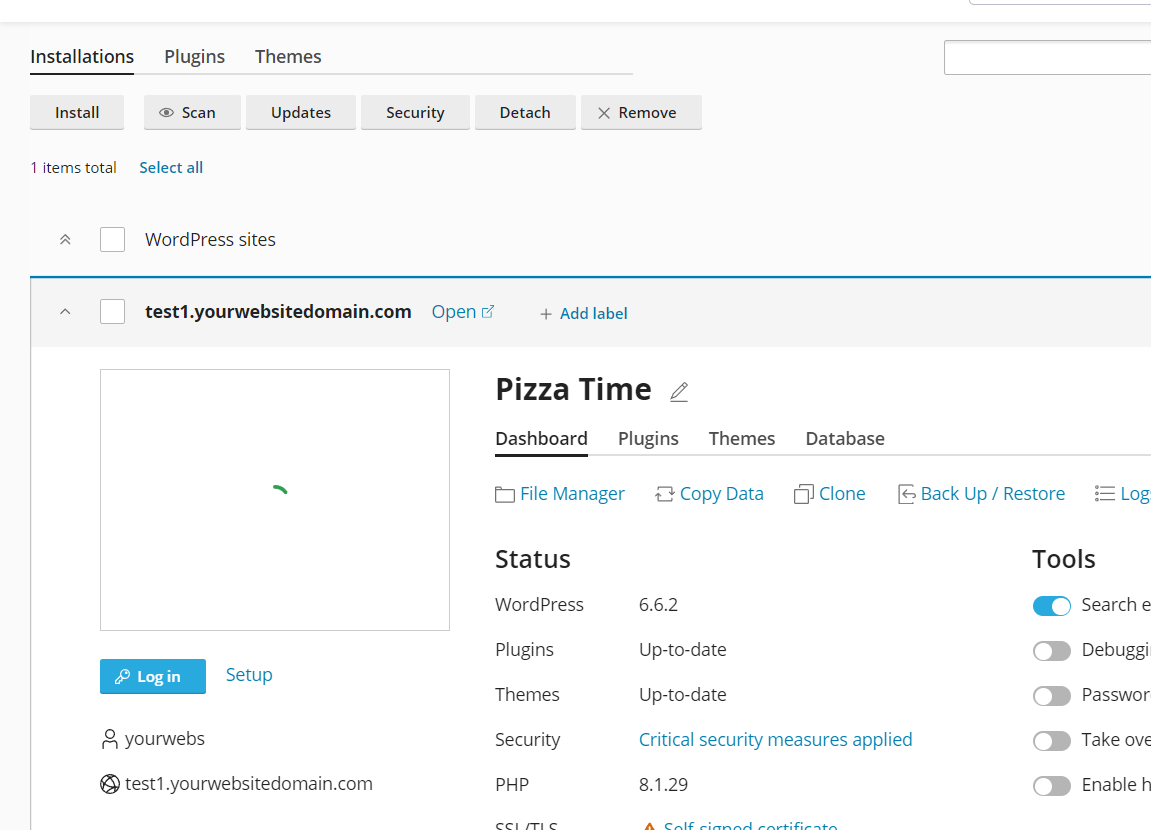
8. The WordPress installation wizard will show the progress. When complete, your WP Toolkit page will refresh, and you’ll see your website details listed.

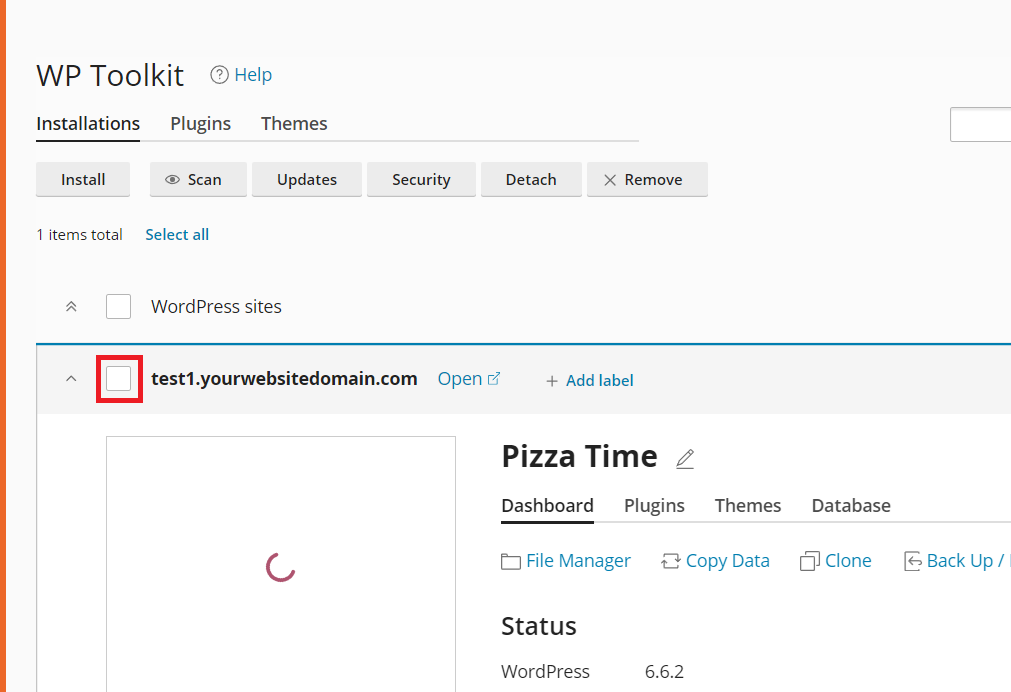
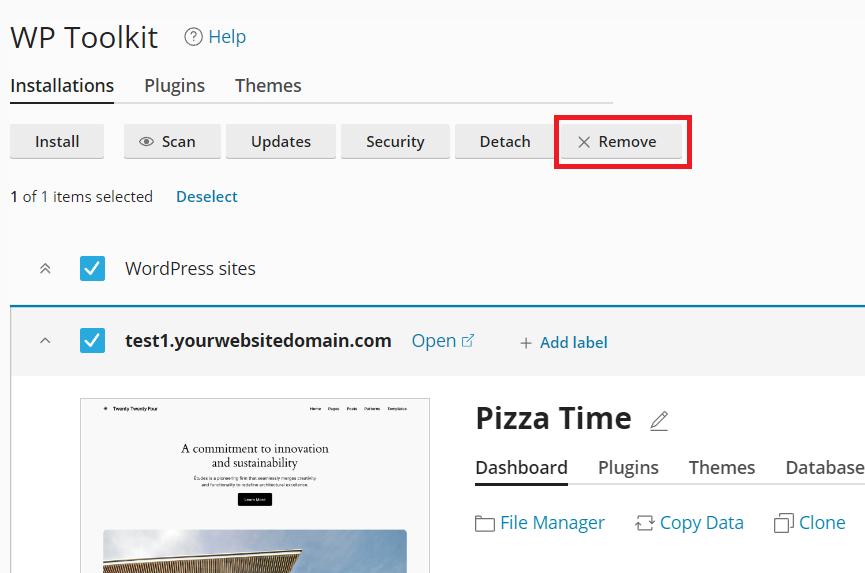
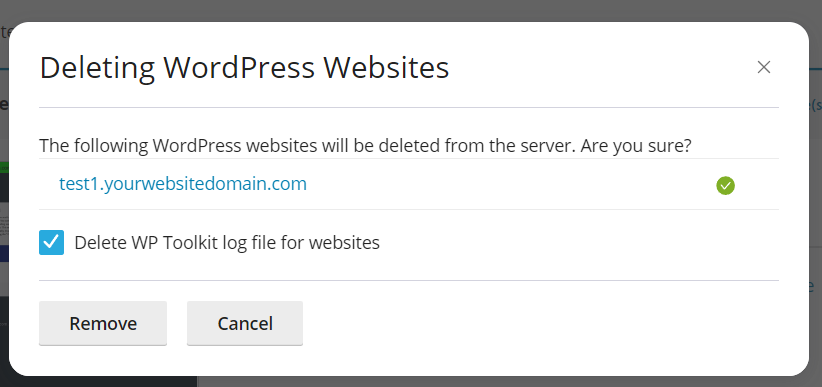
To remove an instance of WordPress
1. From the WordPress Toolkit dashboard, check the box next to the website name you want to remove.