Cloning your site using WordPress Management tools

Lachlan
Last Update 21 days ago
PLEASE NOTE: The WordPress Management clone tool is a feature only available on Business packages and above. You can find more details about each hosting package and the included features on our WordPress Hosting page.
If you are using a Startup package and require clone tools, you may need to consider upgrading to a Business or Business Plus plan.
You will need to be logged into the hosting/cPanel account to follow the steps in this guide. If you're not sure how to access your cPanel service — please, follow this guide before continuing: How do I Login to cPanel?
Cloning a site with WordPress Management tools
1. First, log into cPanel
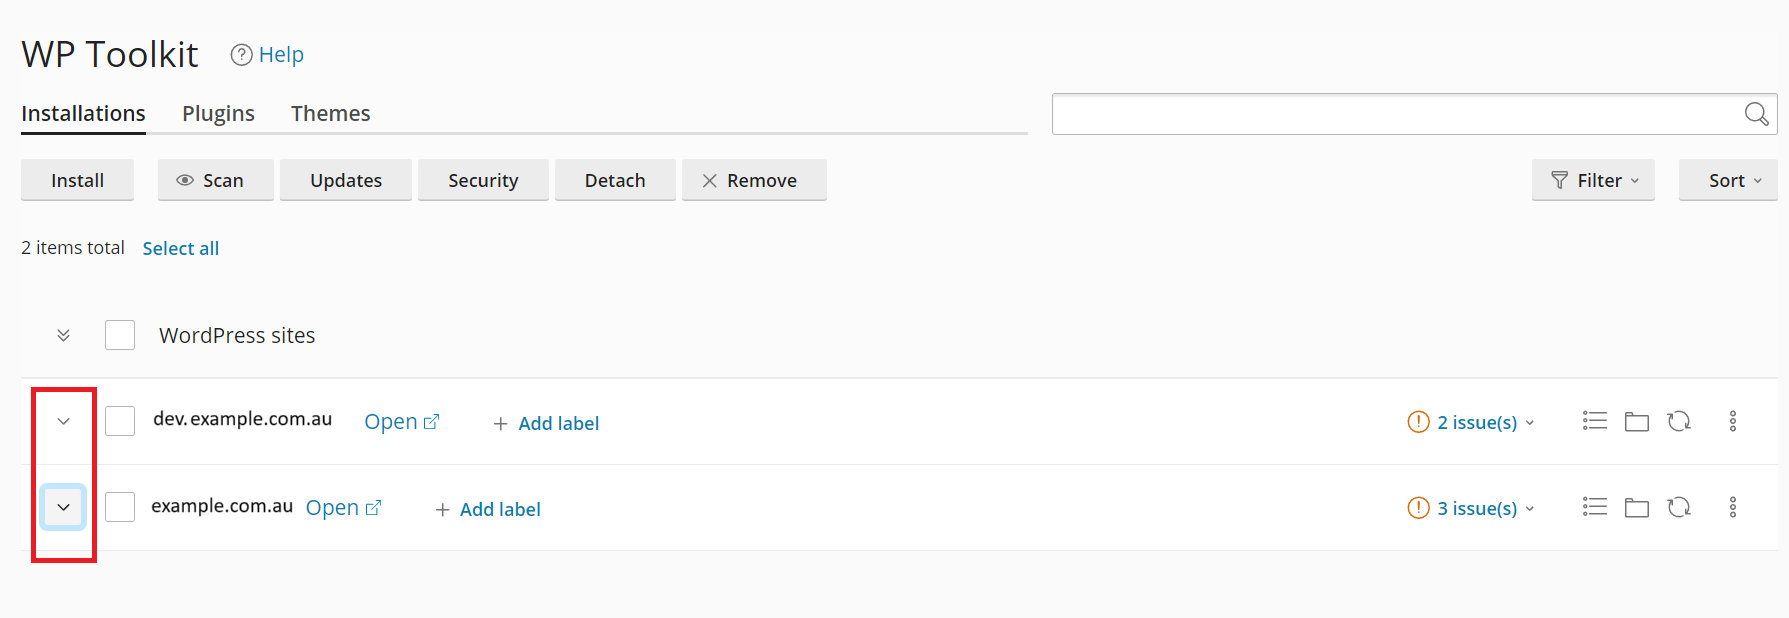
2. Navigate to the 'WordPress Management' from the side menu on the left-hand side of the cPanel interface

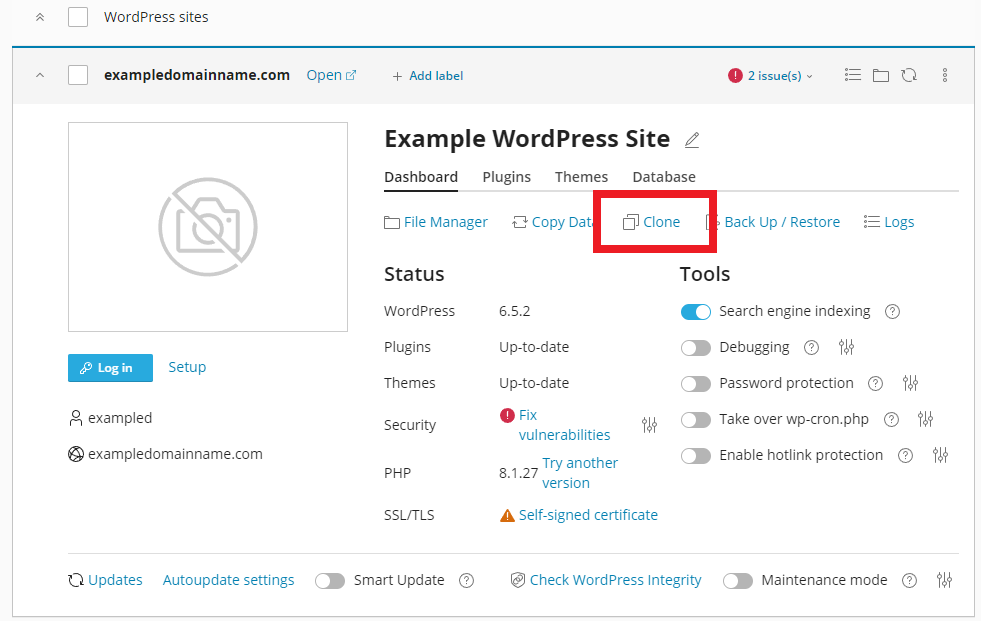
3. From the WordPress Management dashboard, find your site and click the 'Clone' button.
If you don’t see a site preview image in the WordPress Management options, click the ‘expand’ icon (down arrow) next to your site in the list.
4. A menu will appear on the left, select your clone options here. Set the 'Target' options according to your preference;
- Choose 'Create subdomain' to clone the site to a new subdomain
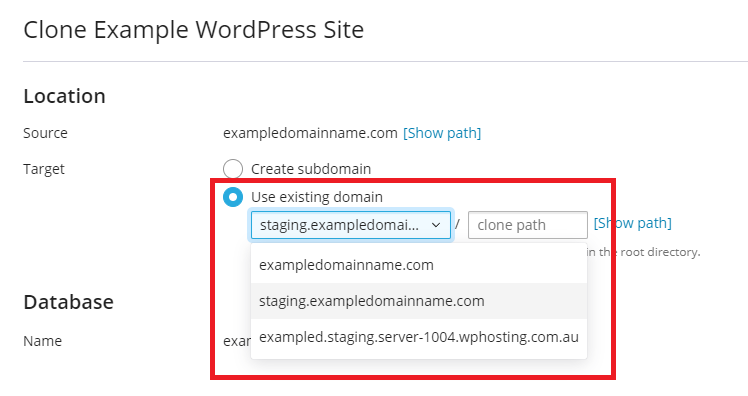
- Select 'Use existing domain' to clone to an existing domain/subdomain. If using an existing domain/subdomain, select it from the drop-down menu.
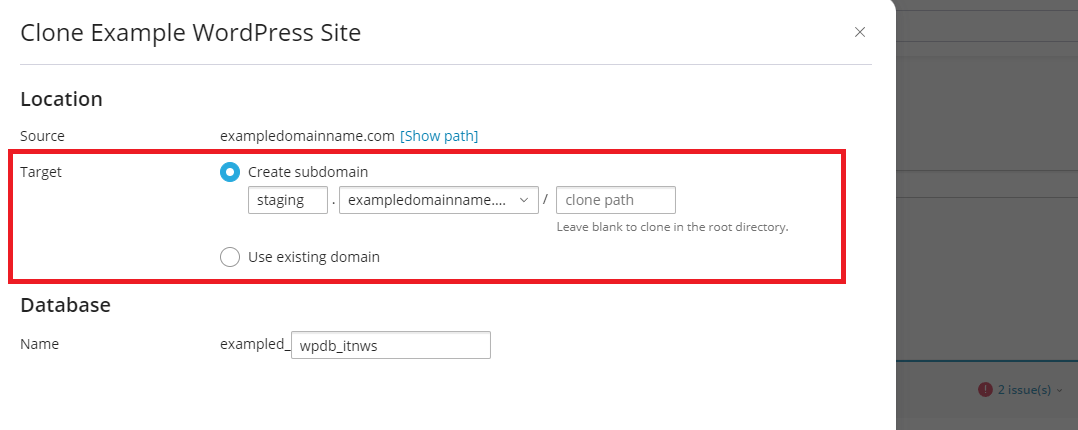
5. Please pay special attention to the 'cloth path' field after the slash (/), leave this blank to clone to the root directory rather than "domain.com/clonedsite" for example.
6. Advanced users may wish to edit the database name but this is not necessary
7. Click the 'Start' button when you're ready to begin the cloning process. The time it takes to complete will vary based on the size of the site.