How to restore a full backup of a website

Alan
Last Update 8 months ago
This topic covers processes relating to the operation of a cPanel service, if you cannot access your service – first follow this guide before continuing.
Restoring an entire website to an earlier version is an easy process. There are 2 ways to achieve this, depending on your situation.
Option 1
If you would like to restore the entire hosting account, you can do so in a couple of clicks. This will restore all files, databases, email accounts and settings to the time you choose.
1. Login to cPanel
2. Under the JetBackup section, click Full Account Backups

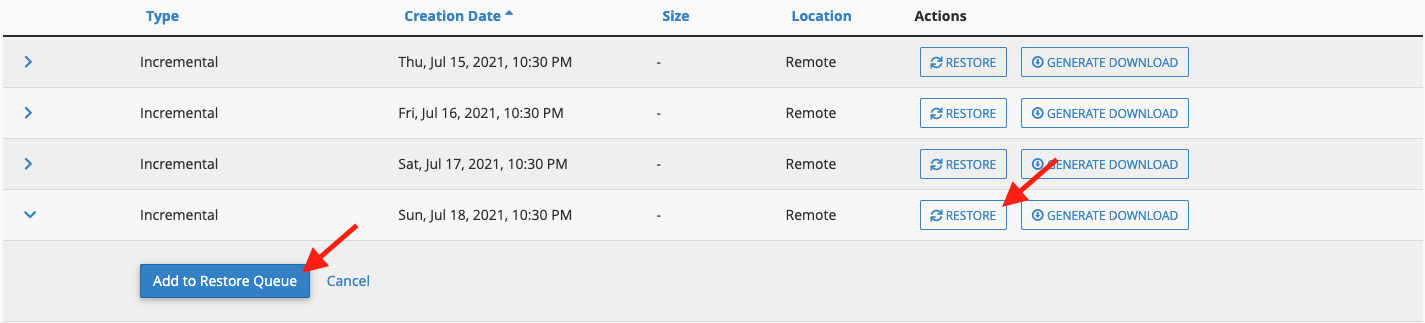
You will then be presented with a list of all available restoration points for your hosting account.
Each backup will have a creation time, so click Restore next to the backup you wish to restore, followed by Add to Restore Queue
The restoration will now begin and may take several minute to complete, which depends how many files and how much disk space is in use by the backup.
You can check the progress of your restoration by going back to the main cPanel page and clicking Queue, under the JetBackup section.
This will show any restorations in progress and any past restorations performed.
Option 2
You may with to restore only the files and/or the database of your website and not the entire hosting account.
To restore website files
1. Login to cPanel
2. Under the JetBackup section, click File Backups

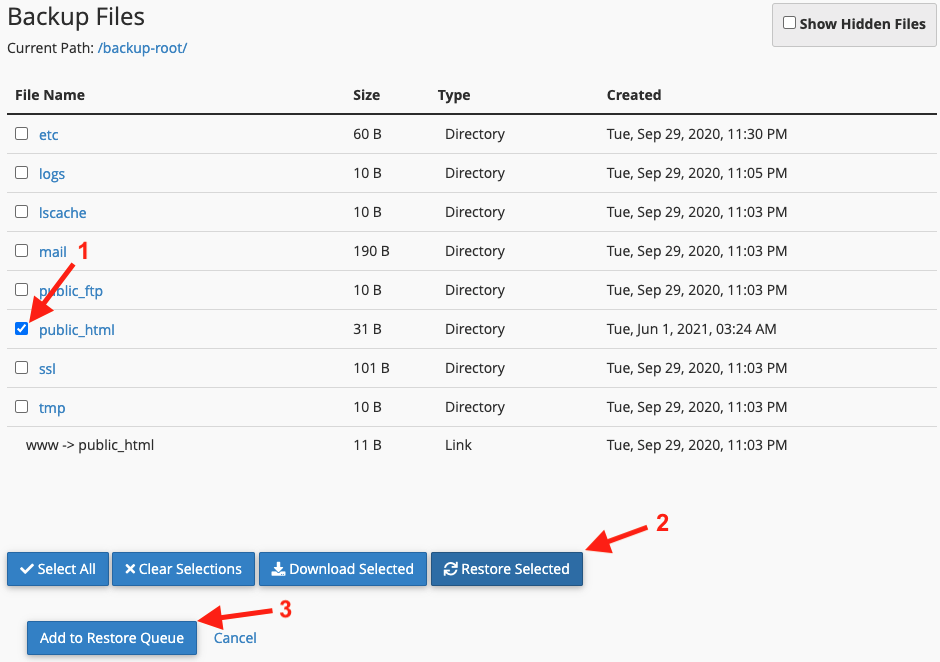
You will then be presented with a list of all available restoration points for your files.
Each backup will have a creation time, so click File Manager next to the backup you wish to restore.

On the next screen, click the checkbox next to public_html, then click Restore Selected. Next, click Add to Restore Queue.
The restoration will now begin and may take several minute to complete, which depends how many files and how much disk space is in use by the backup.
You can check the progress of your restoration by going back to the main cPanel page and clicking Queue, under the JetBackup section.
This will show any restorations in progress and any past restorations performed.
To restore website database
1. Login to cPanel
2. Under the JetBackup section, click Database Backups

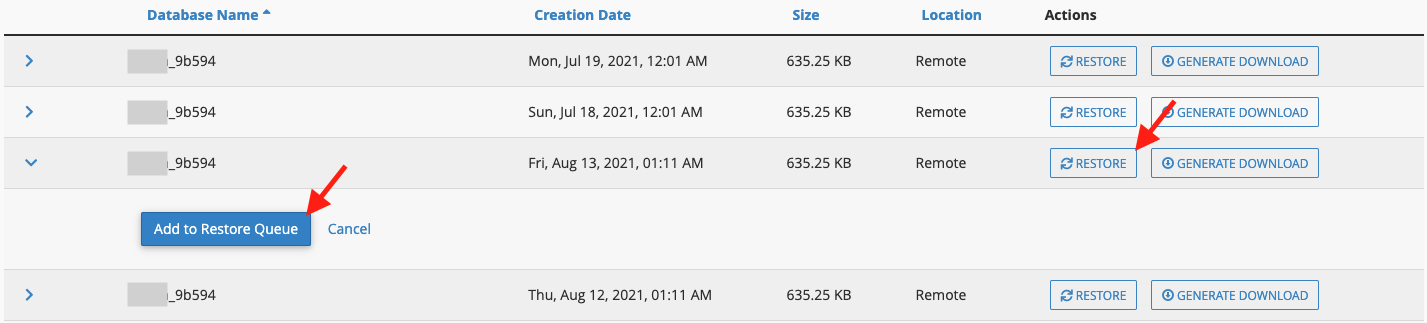
You will then be presented with a list of all available restoration points for your database(s). Be sure to select the right database name and creation date.
Each backup will have a creation time, so click Restore next to the backup you wish to restore, followed by Add to Restore Queue.
The restoration will now begin and may take several minute to complete, which depends how much disk space is in use by the backup.
We are happy to help with account, file or database restores, so feel free to get in touch for assistance.