How to add a plugin on your WordPress site

Marc
Last Update 8 months ago
Installing plugins on WordPress is a straightforward process that enhances your site's functionality with additional features. Whether you're looking to optimize SEO, add e-commerce capabilities, or improve security, plugins offer customizable solutions tailored to your needs.
1. Login to your WordPress site.
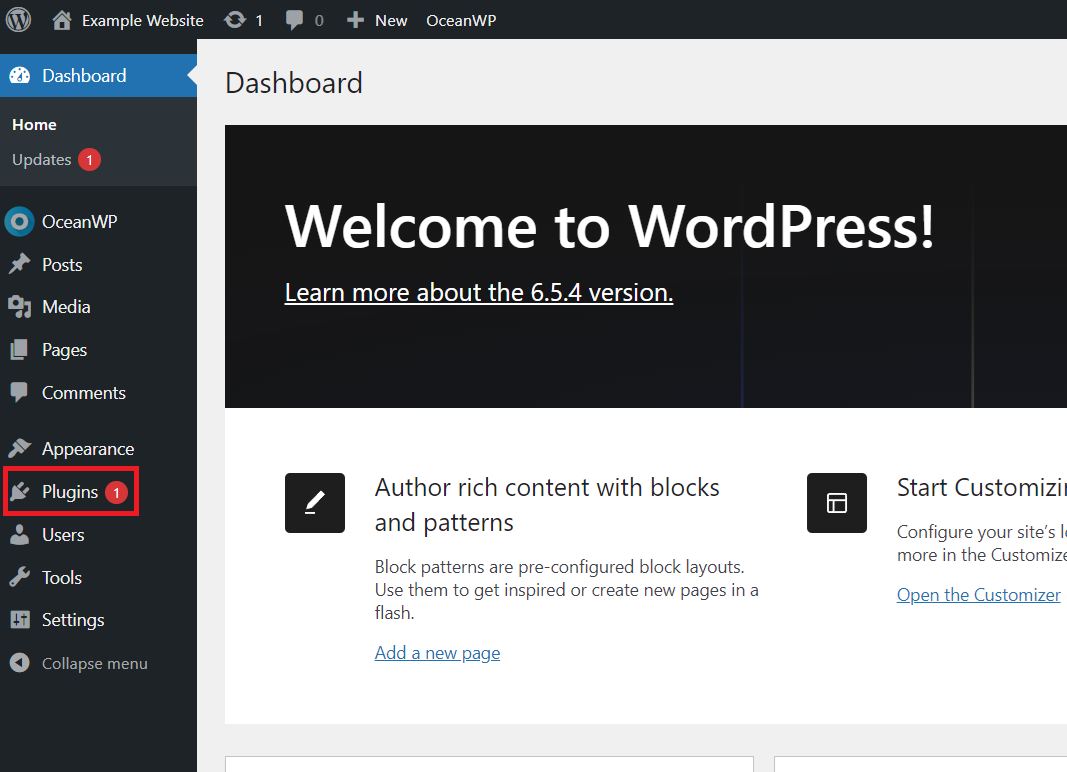
2. Once you are already in your WP Admin Dashboard, look for the 'Plugin' menu and click it
2. Then on the header part kindly click the 'Add New Plugin' button
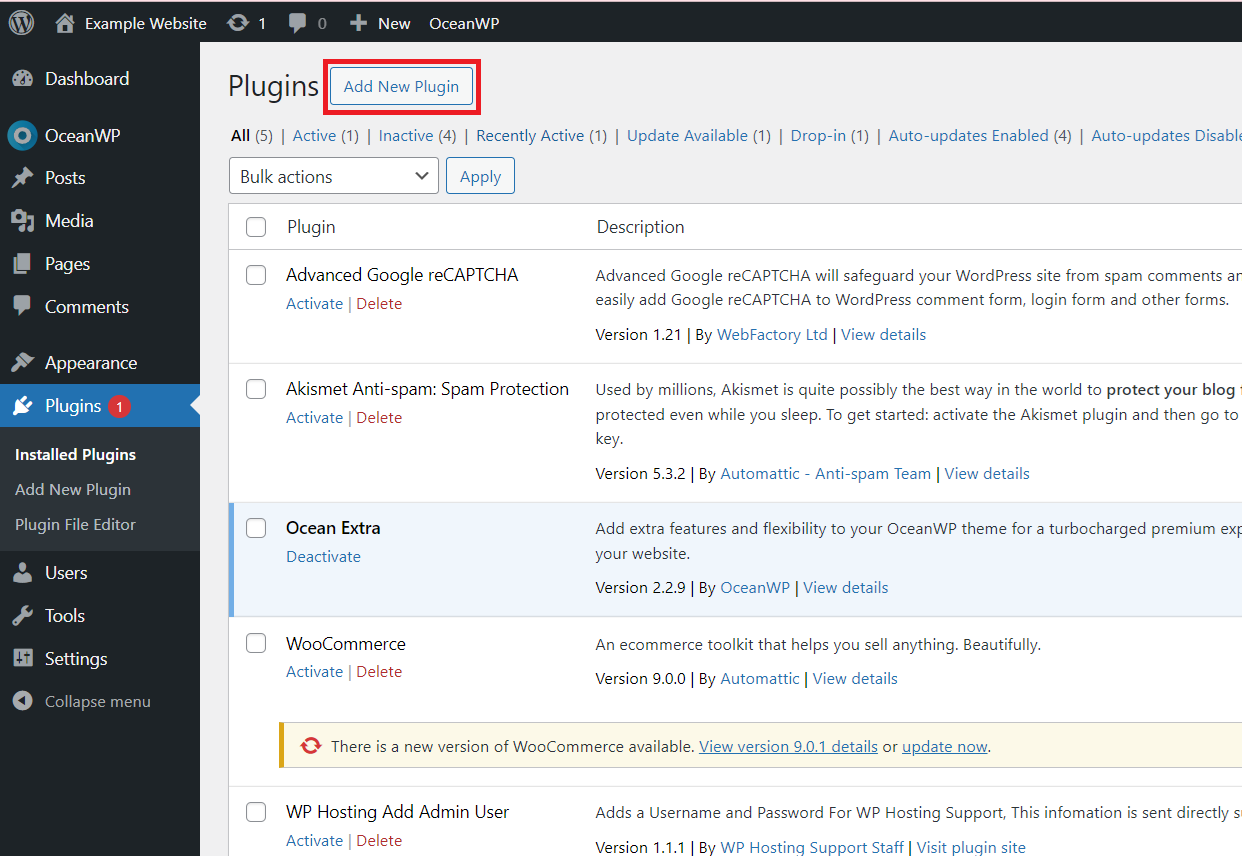
3. There are 2 options on how you will add your plugin; first is you can upload it manually, second is you can search the plugin and install.
4. If you want to upload a plugin, you can follow this step or if you want to search a plugin you can skip this and move on to the next step.
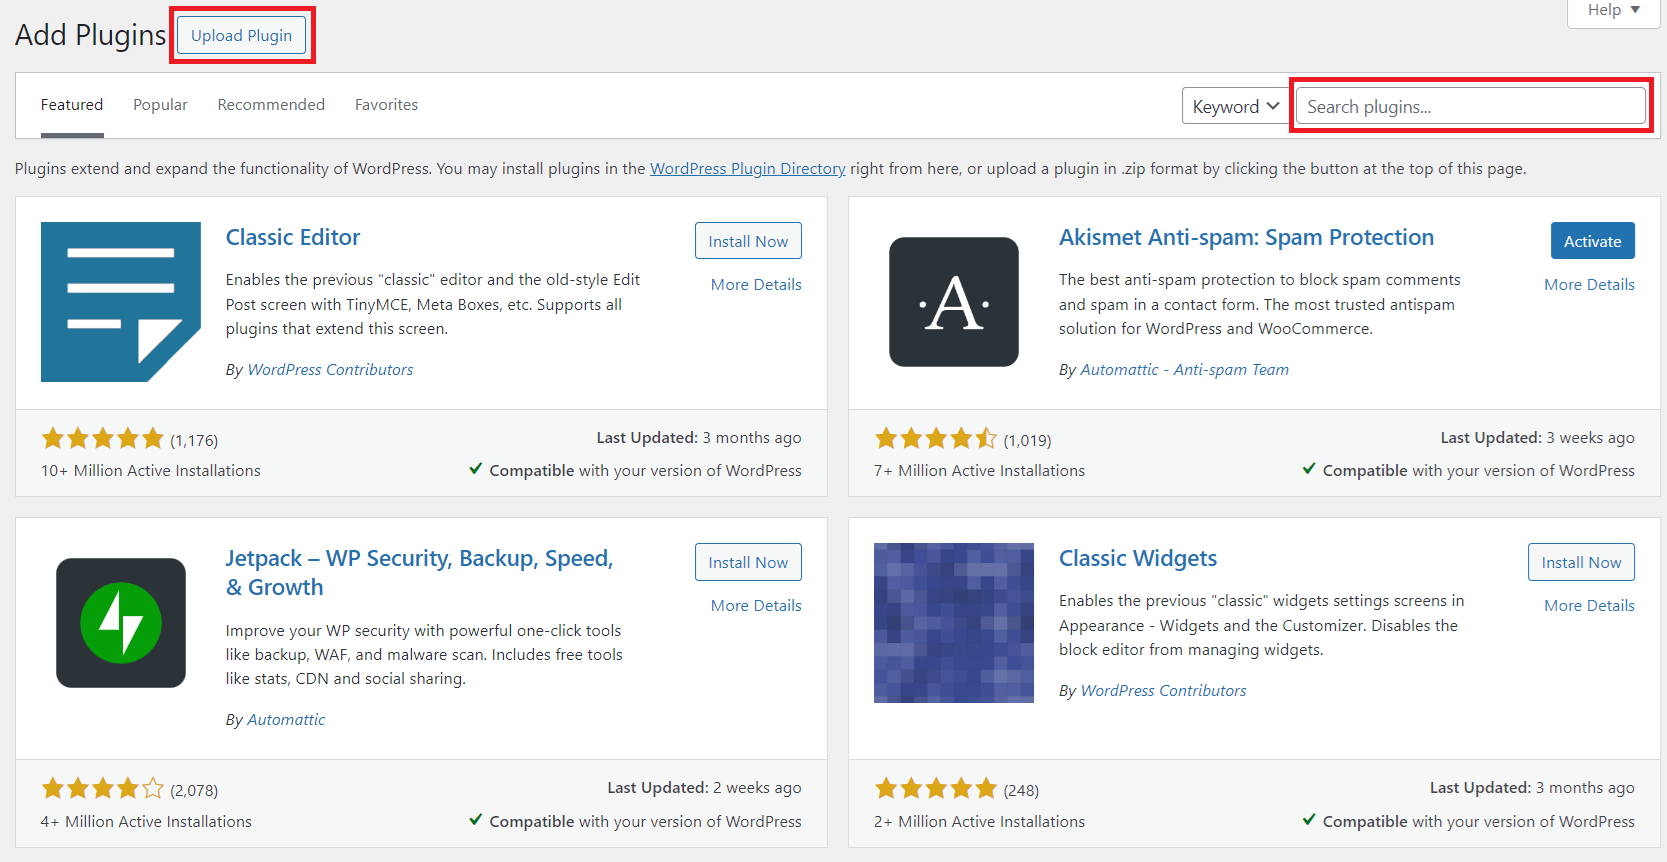
- Click the 'Upload Plugin' button
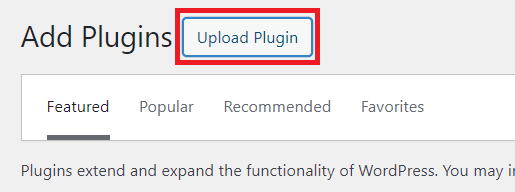
- Click 'Choose File'
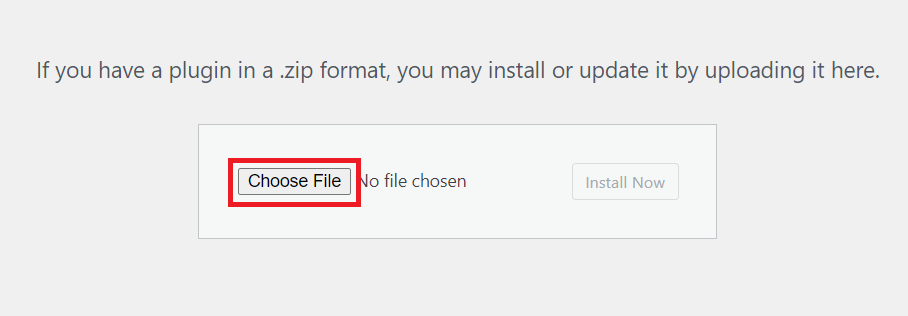
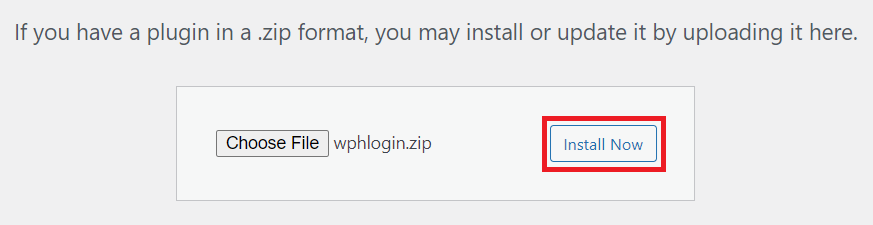
- Select the plugin that you want to install from your computer once done, the 'Install' button should now enabled, click on it to install your plugin.
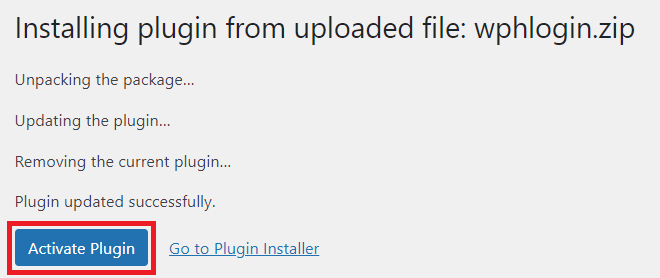
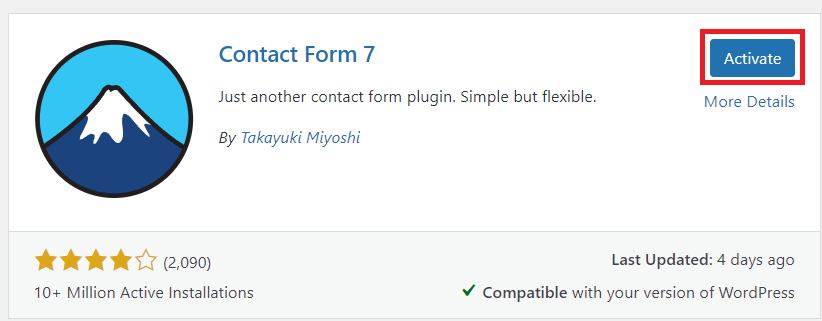
- Once installation is successful, you will see this screen with the details of installation, kindly click 'activate' to activate your plugin then you can start using the benefit of the plugin that you had added.
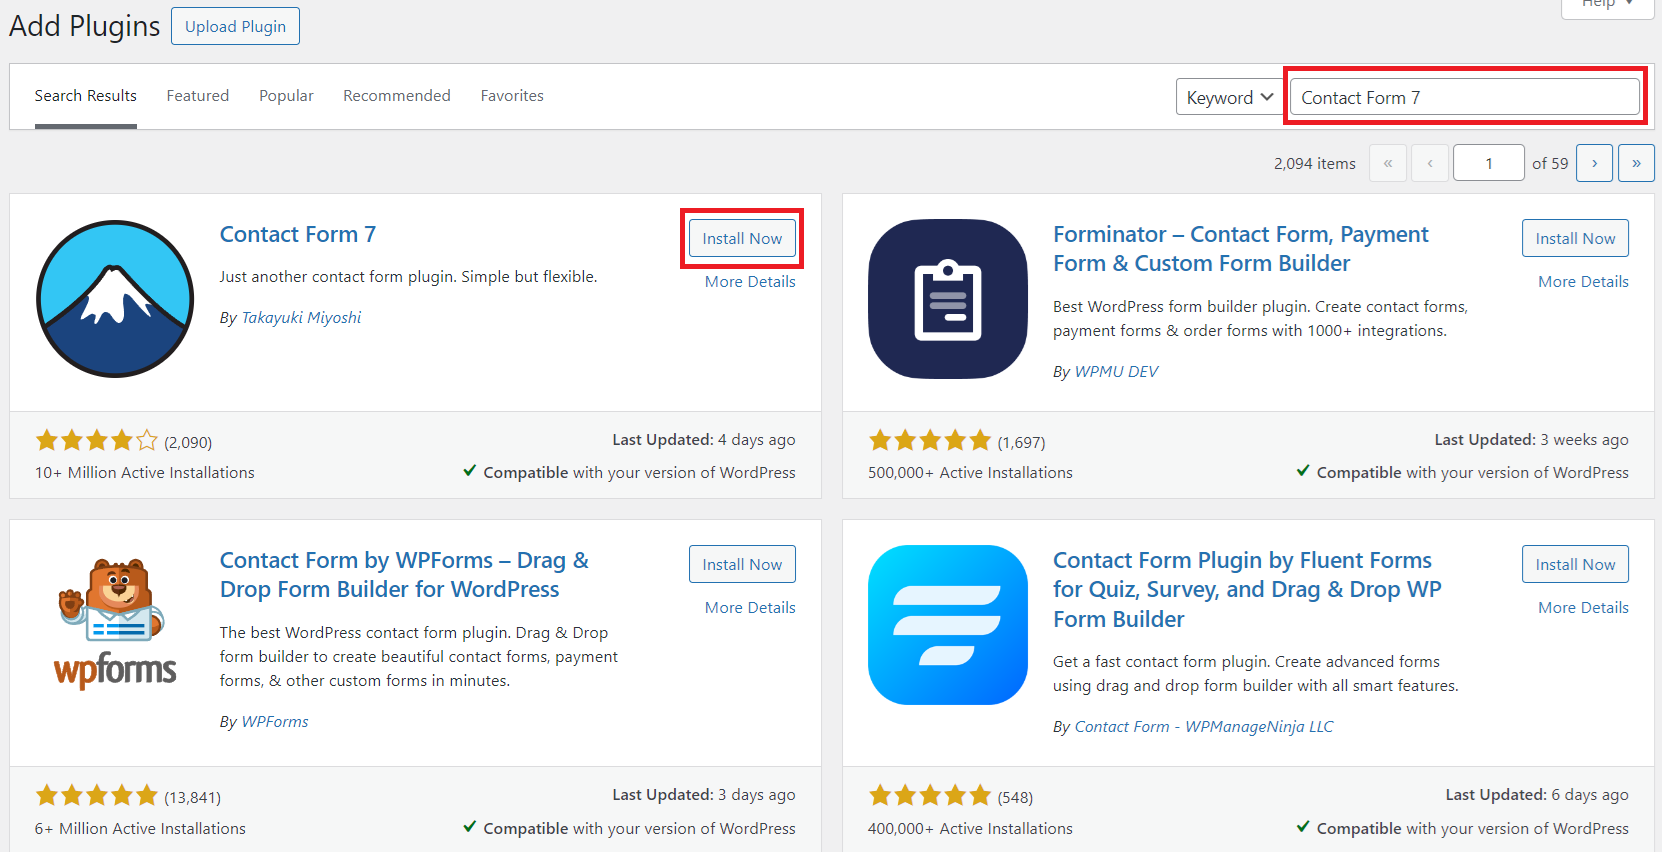
5. If you want to use the search option to find and install your plugin, simply enter a plugin keyword in the search box. Once you find your desired plugin, click the 'Install Now' button.
- After installation is complete, the 'Activate' button will appear. Click it to activate your plugin. You can now start using the additional features of your plugin on your WordPress site.
By following these steps, you can easily expand the capabilities of your WordPress site by installing and activating plugins. Remember to choose plugins that are regularly updated and compatible with your WordPress version to ensure optimal performance and security.