Configure WordPress with WP SuperCache
Stephen
Last Update 4 years ago
Any seasoned WordPress developer or reputable hosting provider when asked for tips on improving the speed of your website will tell you, the number 1 thing that you must check is:
Do I have caching enabled on my website?
If the answer is no, or even if it’s a yes — the video below will walk you through the process.
Configuration
We’ve chosen WP SuperCache for this guide, as in our opinion for a freely available non-premium caching plugin it’s the best choice. Rock solid performance coupled with an easy to use interface makes setup a breeze but still leaves room to improve for those looking for the advanced settings.
Testing
With the configuration out of the way and the site now operating with caching in place – what does all that mean for the website?
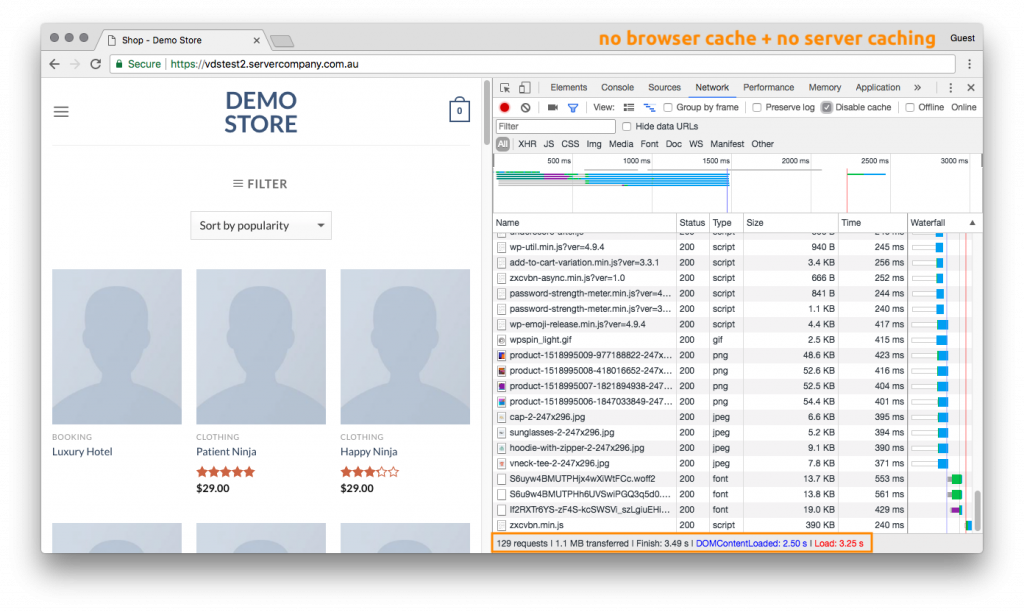
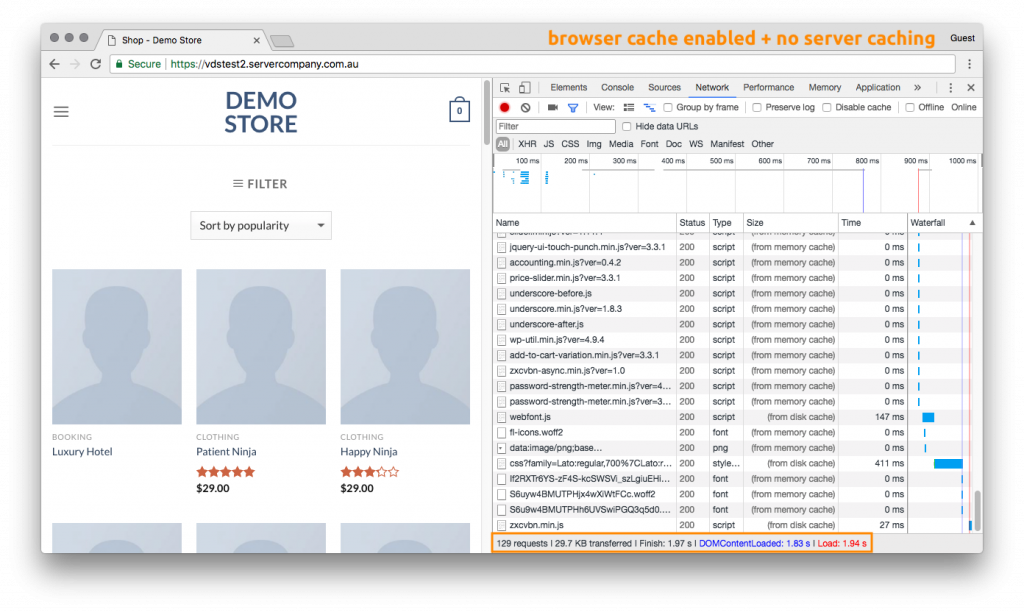
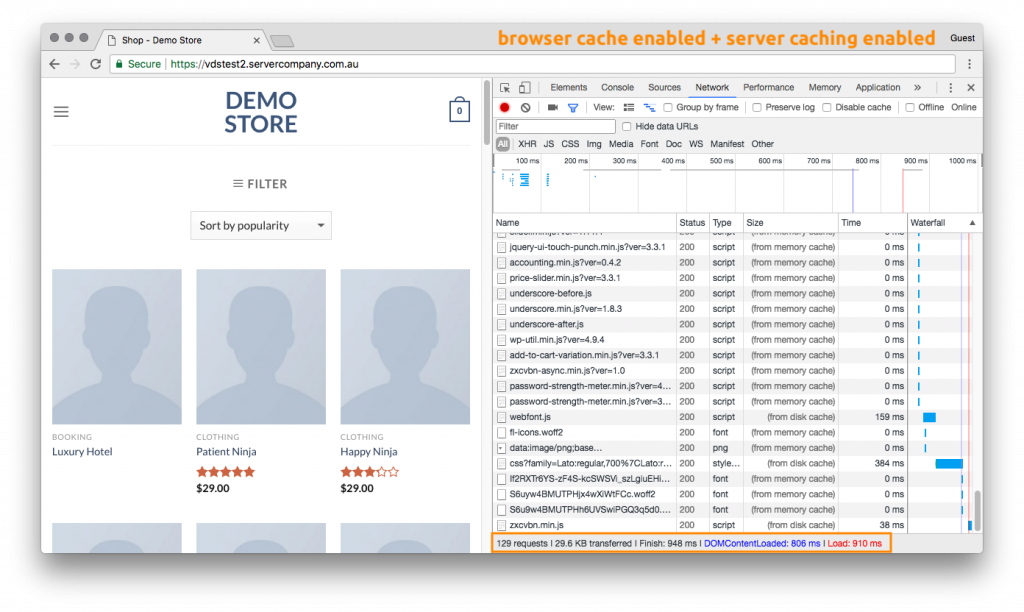
We’ve performed the exact same steps as indicated in the video on our demo website, which is fairly typical of a WordPress site running WooCommerce, with an average page load of about 3 seconds.


Load times are as follows:
- No client side (browser) caching, or server side caching: 3.25 seconds
- Client side (browser) caching enabled, no server side caching: 1.94 seconds
- Client side (browser) caching enabled, server side caching enabled: 910 ms
You can clearly see the difference in the load time of the website when operating with and without caching, as our demo website is now loading 3.57 times quicker than before.
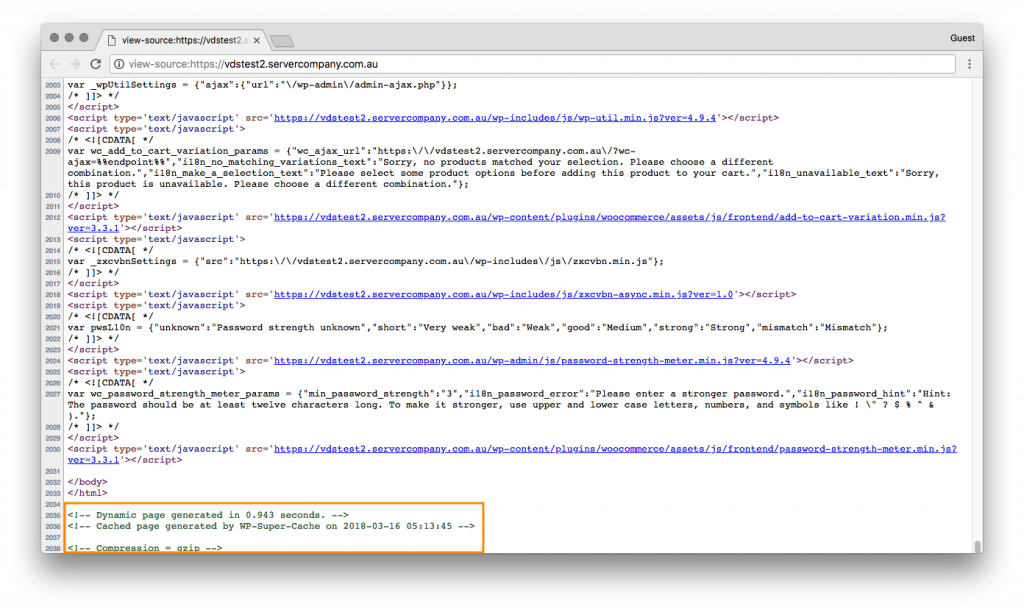
To verify that your website is functioning with it’s caching enabled, simply view the source code of the site, (this option is often found by performing a right-click on the page then ‘View Source’) and once you’ve scrolled to the bottom of the page you should see something like this.

Hope this was useful to you and good luck out there!

