How to add a DMARC record to my domain
Adding a basic/default DMARC record
Lachlan
Last Update 9 months ago
This topic covers processes relating to a cPanel service.
You will need to be logged into the cPanel account to follow the steps.
If you're not sure how to access your cPanel service — please, follow this guide before continuing: How do I Login to cPanel?
If your domain's DNS records are managed here with us, you can follow the steps in this guide to add a default DMARC record to your DNS zone.
NOTE: This guide covers the steps for adding a basic/default DMARC record. If you need a custom DMARC record please see our guide, 'How to Craft a Custom DMARC Record' for more detailed information.
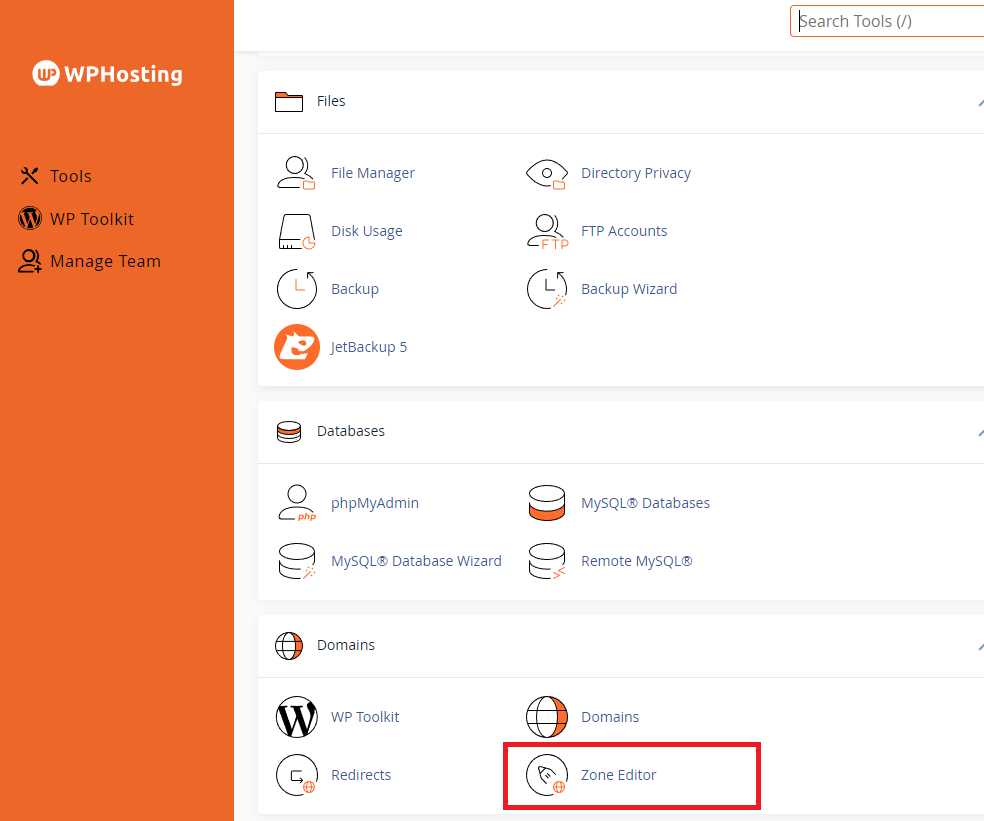
2. Navigate to the ‘Zone Editor’ tool located under the Domains sub-menu

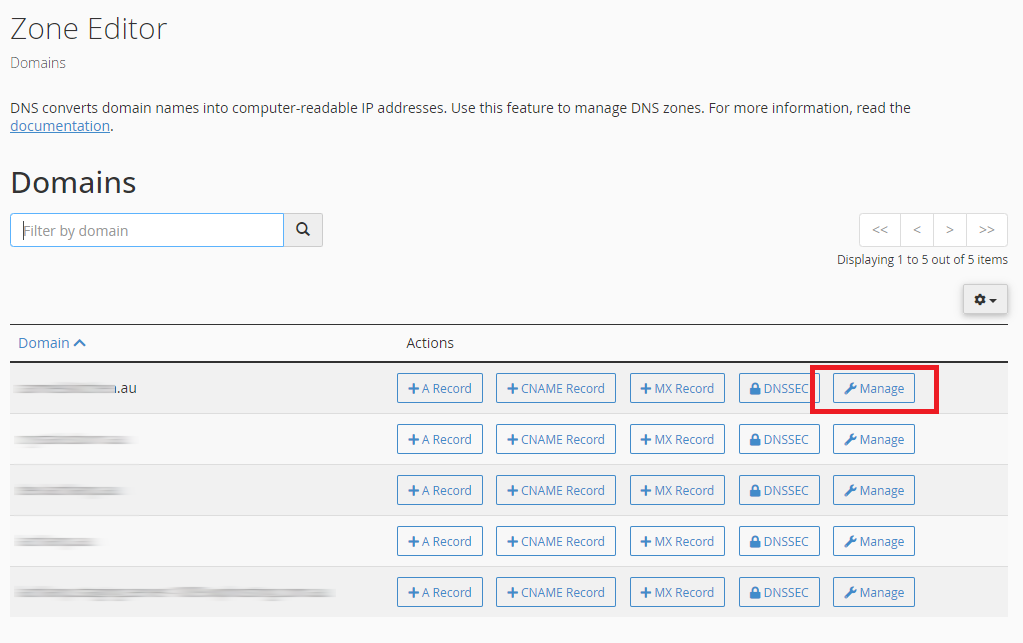
3. Next, locate the domain you want from the list and click the ‘Manage’
button to the right.

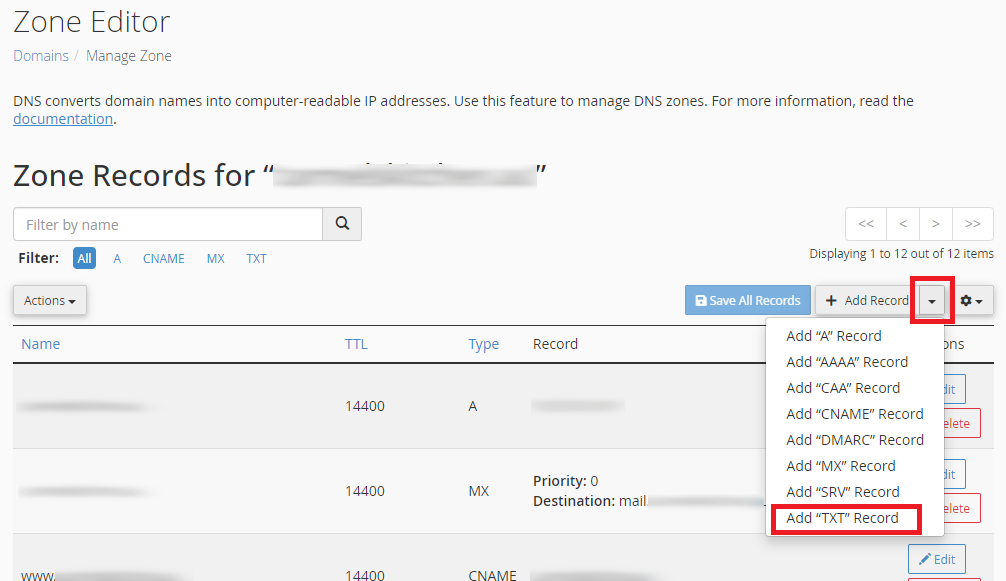
4. Then, click the small down arrow on the ‘Add Record’ button.
5. Choose ‘Add TXT Record’ from the list.

6. Add the following details to create the record;
For the "Name" column, within the "Valid zone name" field add the following:
- _dmarc.example.com
(be sure to replace ‘example.com’ with your domain name)
In the "Record" column, within the "Text" field add the following:
- v=DMARC1; p=reject; adkim=s; aspf=s;

7. Click the ‘Save Record’ button when you're done.
This basic DMARC record will set the DMARC policy to "reject" (p=reject), DKIM checks to strict (adkim=s) and SPF checks to strict (aspf=s).
An SPF record will look similar to this example:
- "v=spf1 +a +mx +ip4:123.45.6.789 include:_spf.wphosting.com.au ~all"
For more information please see our SPF guide: Adding an SPF record to your DNS Zone.
